Water should be an integral part of your emergency preparedness supplies.
According to the EPA, the average American household uses 400 gallons of water a day. While some of this usage is related to non-essential activities such as lawn watering, it’s wise to have a clean, purified emergency water supply for your family. You never know if an emergency will cut off the water supply or even contaminate it.
How much water should I store?
Humans need to drink approximately two quarts (a half-gallon) of water every day to maintain normal bodily functions. Those of us living in hotter environments, where we are more prone to losing water through sweat, should consume more. In addition, you will also need water for food preparation and hygiene.
You’re not going to be taking a shower with your emergency supply, but you’ll need water to wash your hands and possibly flush toilets. So in addition to your half-gallon of drinking water, you should account for an additional one to one and a half gallons of water for food preparation and sanitation. Rounded up to be safe, each person may use up to two gallons of water a day.
Assuming you have a family of four (two adults and two kids), and you want to have enough water to last you two weeks in an emergency, you’ll need:
2 gallons/person/day * 4 people * 14 days = 112 gallons of water
The sections below will give you tips on how to gather and store a water supply of this size.
If you have any pets, make sure to account for their intake. For example, a 25-lb dog will generally drink about a quarter gallon of water a day. Pets won’t have the same food preparation or sanitation needs, so you’ll just have to account for their drinking intake.
Don’t underestimate the importance of making sure you have enough water. Dehydration, especially in an emergency situation, can be fatal. Dehydration can lead to sleepiness, lethargy, foggy thinking, delirium, and fever. After just 3 days without water, the body will start shutting down, and any further length of time without water may be fatal.
Preparing a Water Supply Before an Emergency
Water is all around us, and there are many options for collecting and storing water for an emergency.
For any of the options below, it helps to put the water storage containers in a dry, cool, dark place. Don’t store them near gasoline, kerosene, or pesticides, as vapors can penetrate the plastic and contaminate the water.
Commercial Water Supplies
Commercial mass-market water bottles, such as from Aquifina or ArrowHead, are great options for building your emergency water supply. If you shop around or go to bulk stores such as Costco or Sam’s Club, you can purchase cases of bottled water for as little as $1.75/gal.
According to the FDA, commercially bottled water that has been stored (unopened) in a cool, dry place has an indefinite shelf life. While bottled water is generally stamped with a date, this is meant to indicate the water’s “freshness” rather than as a safe-to-drink indicator: water older than the date may smell or taste slightly off, but should be safe to consume.
In addition, there are several manufacturers of packaged emergency water kits, such as Mainstay and Datrex. They sell sealed water pouches that claim a shelf-life of 5 years (and will probably be well longer than that).
Home-Made Water Supplies
If you’re not interested in spending money on commercially packaged water, you can also “package” your own emergency water supplies from your home tap water. All you have to do is sanitize the containers and purify the water.
First, you’ll need to think about what kind of container you’ll be storing the water in. Generally, you want to look for food-grade (FDA-approved) containers. Polyethylene plastic is commonly used. Here are some good options:
Do not use these types of containers:
- Plastic jugs or cardboard containers that had milk or fruit juices: they can be hard to clean and harbor sugars that can grow bacteria
- Containers that were previously used to store chemicals or fuels
- Glass containers, as they are heavy and can break
- Garbage bags, as they can leech chemicals
- Water-bed bladders, as they’ll likely still be coated in chemicals
Whatever you choose, you should sanitize the container before filling it with water. Using dish-washing soap, lightly scrub the containers (make sure you’re not scratching them) and rinse completely so there is no residual soap.
When using your own soda bottles, you should additionally sanitize them by adding 1 teaspoon of non-scented household liquid bleach to a quart of water. Pour the solution into the bottle, and shake it so it touches all surfaces of the inside of the bottle. Dump out the solution and rinse thoroughly with clean water.
Next, fill your container with tap water from your sink or hose. If your local water supply is treated with chlorine, you do not need to add anything else to it. However, if you are using water from a well or want to be extra safe, you can add one drop of non-scented household liquid bleach for each liter of water. So, for a 2-liter bottle, add two drops.
Let the container sit for 30 minutes. The water should smell slightly like bleach. If it does not, add another drop and let it stand for another 30 minutes. If it still doesn’t have a slight chlorine odor, you may wish to throw the water out and try to find another source.
Make sure to tightly seal the container using the original cap.
Write the date you filled the bottle directly on it, so you know how old it is. Water that has not been commercially bottled should be replaced every six months.

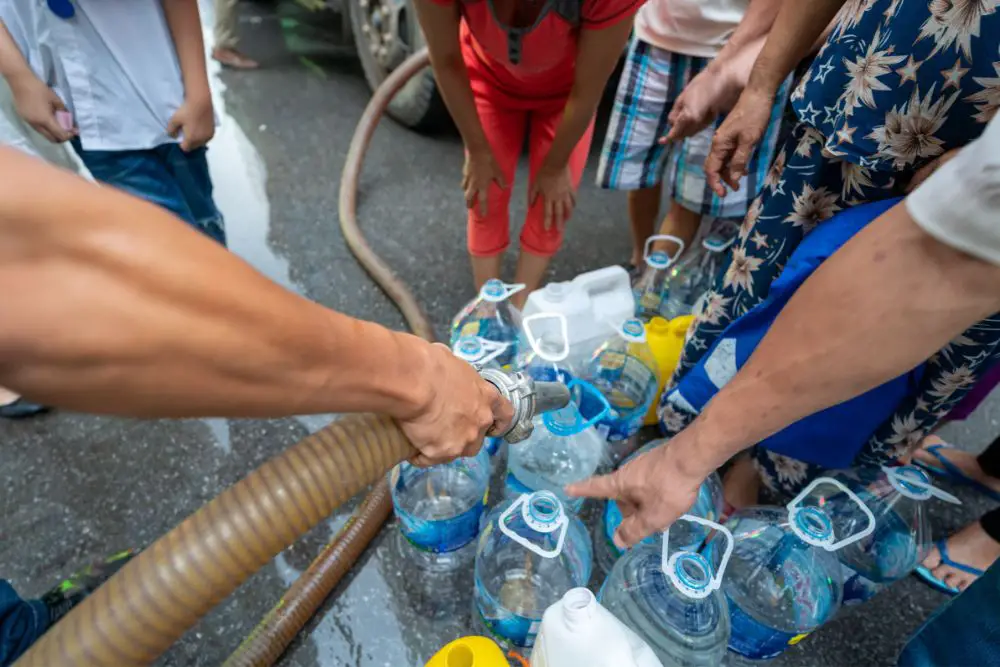
Gathering Water Supplies During an Emergency
If you haven’t yet built up an emergency supply of water, or you start running low, you may be able to gather extra water supplies from around your house when the emergency starts.
Possible sources of water include:
- Hot water tank
- Water is already in the pipes throughout your house
- Ice in your freezer
- Local rivers, streams, and ponds
To gather water from your hot water tank, you need to shut off the input valve. Even if you have enough additional water reserves, you may want to do this as soon as an emergency strikes if you’re worried about the local water supply being contaminated. Next, turn on a hot-water faucet, or open the drain at the bottom of the tank. Once you’ve drained it, you may need to filter the water if you see sediment from the bottom tank (see below).
Your house’s pipes will also have quite a bit of water in them. Simply turn off your house’s water input valves (the water coming in from the outside) and use one of your lowest floor’s faucets to get to the water.
Ice from your freezer can also be melted for water. If you have an extra chest freezer, you could build a supply of 2-liter water bottles in the freezer to be available later in an emergency. The frozen bottles will also be nice to have to cool off if temperatures are high or to keep your refrigerated goods cold for a few extra days.
You can also fill your bathtub during an emergency. You can then use the tub’s supply for washing, or purify it before drinking (but not both).
If you’re going to be using water from a local stream, river, or pond, make sure you properly filter and purify the water before use (see below).
Do not use water from your:
- Pool
- Toilet, or toilet flush tank
- Radiators
- Water-beds
Filtration and Purification
Water from unknown sources can contain harmful microorganisms (germs, bacteria, viruses) that cause health problems such as pain, dysentery, typhoid, or hepatitis. If you’re going to be using water that hasn’t been previously purified, you should make sure you do so before you drink it.
Before treating any water, you can filter it if you see any floating particles or contaminants. The simplest way to do this is to strain the water through a coffee filter or even a paper towel.
There are several methods for purifying water.
Boiling is a great method for purifying water, as it’s the simplest to do and will kill all microorganisms. However, boiling water won’t remove contaminants such as metals or chemicals. Boil the water for at least 1 minute (source: EPA), or 3 minutes if you’re at a location above 1 mile. Make sure you let the water cool before drinking. You can improve the taste of boiled water by re-oxygenating it by pouring the water between two containers several times.
Chlorination is another method of purification. Household liquid bleach kills most microorganisms. You should only use regular, liquid, non-scented household bleach that contains between 5.25% to 6.0% sodium hypochlorite (this is what you’ll generally find at your local supermarket). Don’t use a scented or color-safe variety. Bleach’s power diminishes over time, so check its expiration date — bleach has a shelf life of 2 years or less. To purify water with bleach, simply add 16 drops (1/8 tsp) to each gallon of water, stir, and wait 30 minutes. For 5 gallon containers of water, use 1 teaspoon. For 55 gallons, use 3 tablespoons. The water should have a slight chlorine scent to it. If it does not, add a second round of bleach and sniff it again. If it still doesn’t have a chlorine scent, you may want to try to find another water source.
Water distillation
Distilling is another great option for purifying water. In addition to killing microorganisms, distilling removes all other contaminants such as metals, chemicals, and salts. To distill water, you want to boil the water so that it changes to water vapor, then re-condenses back to water in another container. This removes everything but pure water. FEMA has a nice diagram for one way of doing this, and Wikipedia lists many other great methods.
Finally, there is a whole slew of additional options that hikers and backpackers use. MSR, Katadyn, and others provide many great products for purifying water that hikers have been using for years. I would not suggest solely relying on one of these products for emergencies as they’re generally built for only a single person’s use. In addition, many of these products only help with filtering water or purifying water, but not both.
In any case, no matter what you choose be sure to build up your emergency water supply now before you need it!